 Tasodrums
Recap
Before we go further with drum notation, here are the previous posts again for review. If you're learning drum notation, or notation in general, for the first time, start with these:
Notation 1: The Basic Concepts
Notation 2: Drum Notation
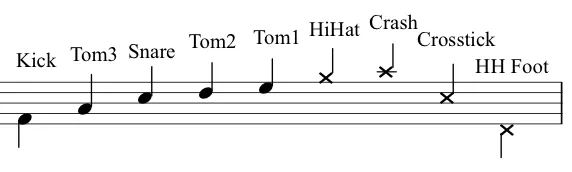
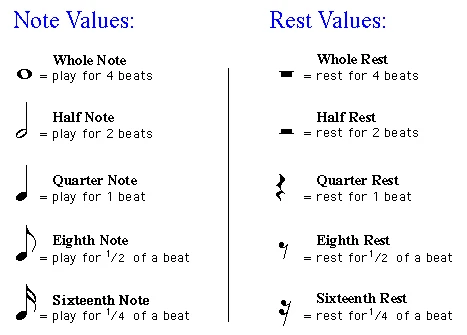
So far we've learned the basic concepts of music theory, what the different notes look like and how they fit into a certain tempo. We've learned how drum music is written and read, and we've done a few exercises playing from notation. Here's a recap of the most common drum notes and how they're written.
Rests
It's important to remember that every note has a rest of the same length. For example, a quarter note has a quarter rest, which lasts just as long. There's nothing special about rests as such: when there's a rest in the music, you don't play.
Often a rest is only written for one drum. It shows you clearly where the actual note goes. That's why it's important to learn to read and understand rests too.
Open hi-hat, cross-stick, ghost notes, accents
Now that you know what the basic notes look like, let's add some examples of markings you'll probably see a lot.
The next example has two bars of a basic eighth-note groove: the hi-hat plays eighth notes, the bass drum plays on counts 1 and 3 and the snare on counts 2 and 4.
Let's use this groove and start adding new notes to it one at a time.
Hi-hat pedal & open hi-hat
Let's start the first bar by playing the hi-hat pedal on eighth notes. If you're a total beginner: playing with the pedal means you don't play the hi-hat with a stick. Instead, you open and close the hi-hat by pressing the pedal, and that makes the sound.
Let's add an open hi-hat at the end of both bars, on the last eighth note. An open hi-hat is marked either with a small circle above the note or by circling the note's x.
Cross-stick
In the first bar of the example below, the snare strokes are cross-sticks.
For a cross-stick, you lay the stick across the snare with your palm in the middle of the head. Then you lift the end of the stick and hit it against the snare's hoop. You can find tutorials for this on YouTube.
Ghost notes
In the second bar, two ghost notes have been added after the normal snare stroke. A ghost note is a stroke played more quietly than the other strokes. In the notation it's shown in parentheses. Ghost notes come up a lot, so it's worth spending time on them.
Accents
Accents are super important! The opposite of ghost notes, accents are single strokes that are louder than the strokes around them. By moving the accent around, you can make any groove sound more alive. A monotone voice is boring to listen to, and in the same way, drumming at just one volume is boring to listen to. Use accents, normal strokes and ghost notes to add texture to your playing. In the exercise below, the accents are marked with a > sign. Read more about this in this post.
Groove exercises
Practice what you just learned with a few example grooves.
Next, let's switch the hi-hat to the ride and add a crash at the start of each bar. Otherwise the groove stays the same.
Let's add some ghost notes, right after the regular snare stroke.
Finally, a few bars that combine everything in this post.
Want to practice reading music on your own?
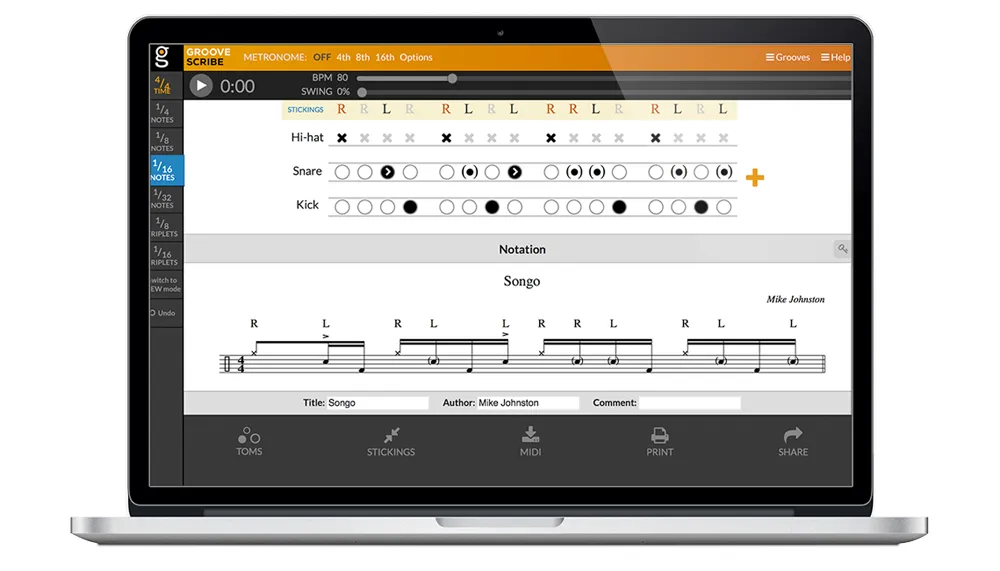
The best way to learn to read music is to practice. Groovescribe is a free browser app that makes it easy to practice reading music.