 Tasodrums


Get your stick technique right from the start
Focus on finding the right grip as soon as you start playing drums, and you'll avoid problems later. Grips and stick motion are hard to explain with text and pictures, so I definitely recommend watching the videos too.
How do you hold a drumstick?
There are a couple of good basic rules for holding a drumstick that are worth learning right at the start.
1. Which fingers hold the stick: Hold the stick either between your index finger and thumb, or your middle finger and thumb, or somewhere between those three. This pivot point is what lets the stick move and lets you use the bounce after the stroke. The rest of your fingers stay relaxed around the stick, guiding and controlling it, but still giving it room. Don't squeeze the stick, hold it loosely in your hand.
2. Where to hold the stick: The fulcrum, or balance point, is somewhere between the middle and the butt end of the stick, usually about a third of the way up from the butt end, depending a bit on the stick. When you hold the stick at the fulcrum, there's a couple of centimeters of space between your palm and the butt end of the stick. Holding the stick at the fulcrum gives you the best bounce and lets you play with less effort.
Stick grips
There are four basic stick grips. Three of them are so-called "matched grips", where both hands hold the sticks the same way. In the fourth grip the hands are different, which is why it's in its own category.
Matched Grips
- German Grip
- French Grip
- American Grip
Traditional Grip
- Traditional Grip
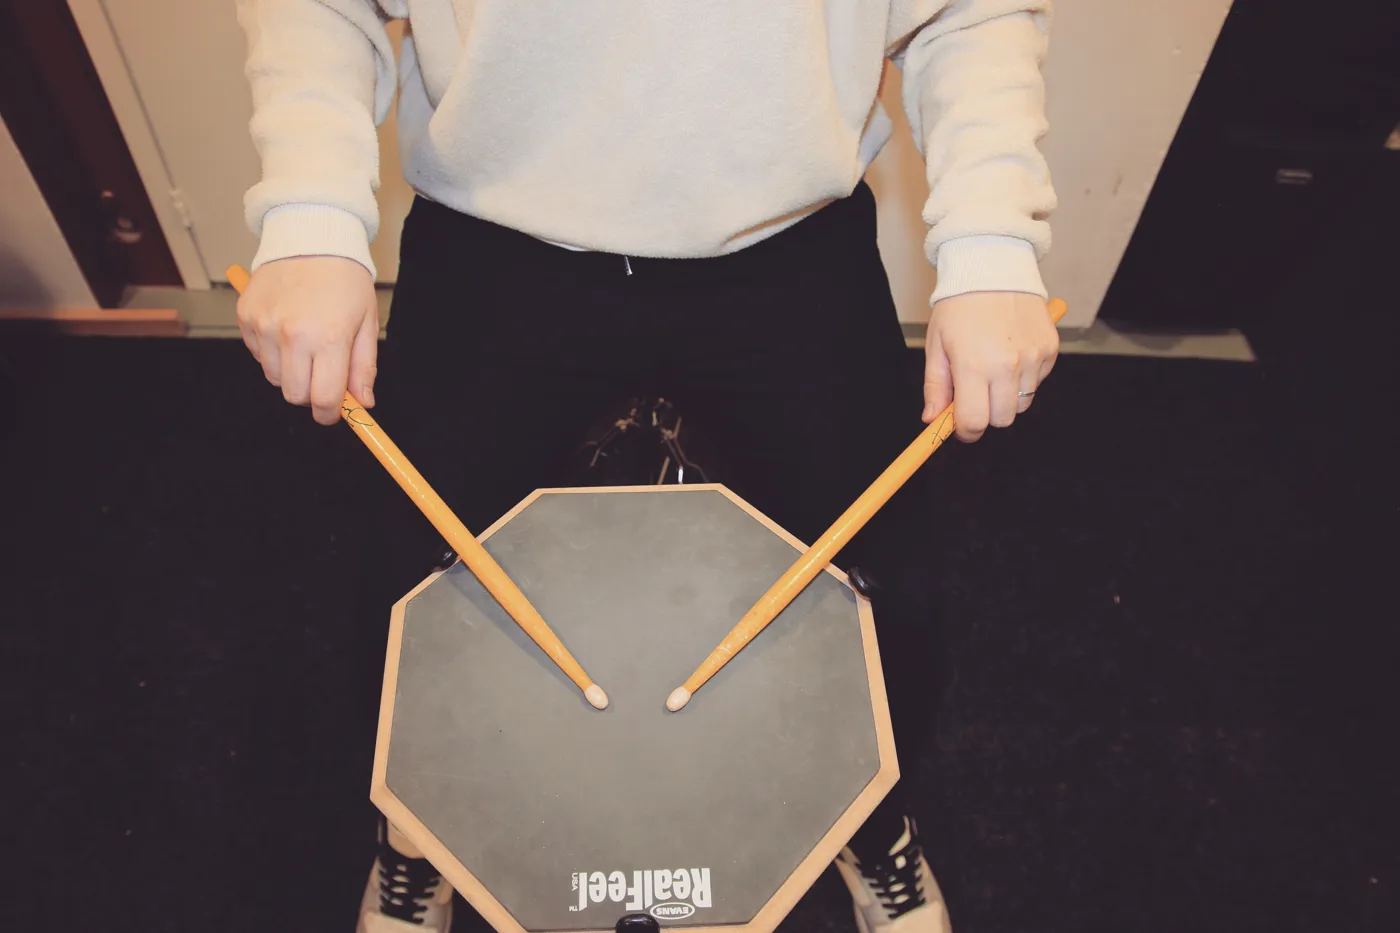
German grip. Your knuckles point to the ceiling and the motion comes more from the wrist.
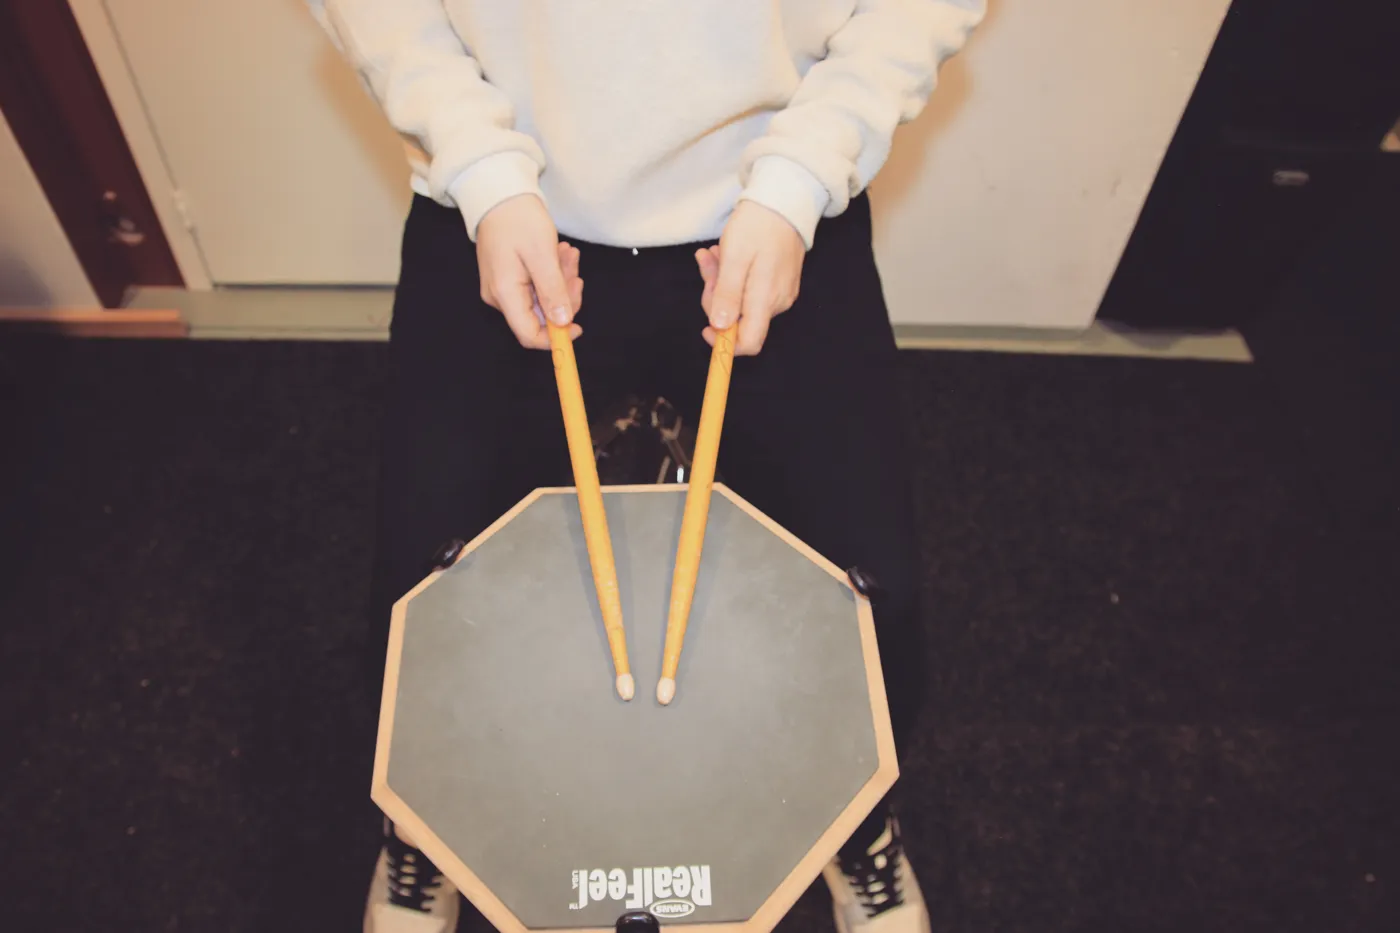
French grip. Your thumbs point to the ceiling. This grip takes more finger dexterity, and its strengths are precision and control.
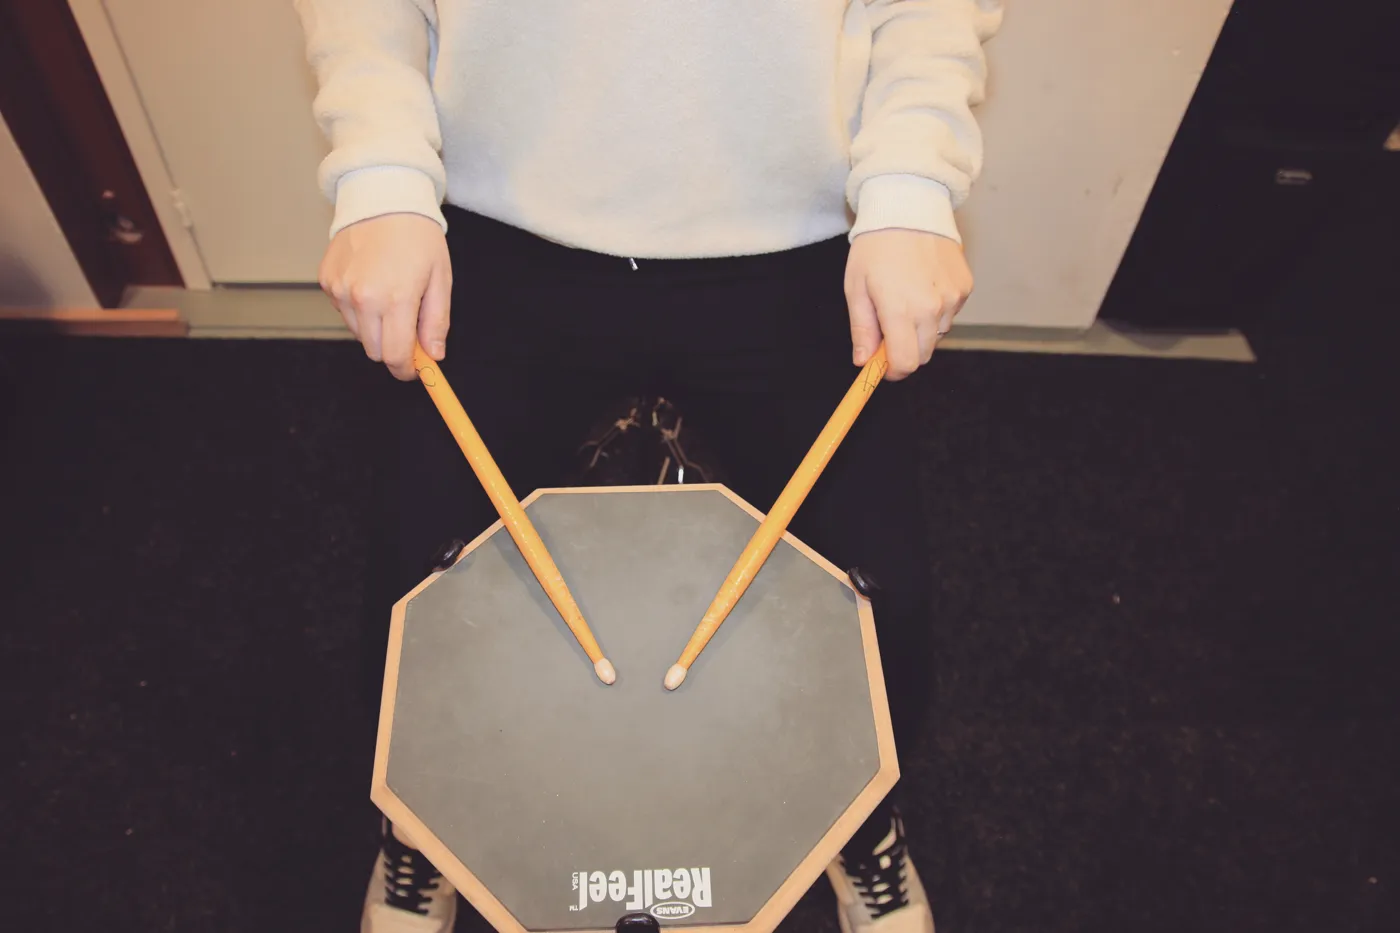
American grip. A mix of the two above. The gap between your thumb and index finger points to the ceiling. This is the grip beginners often pick without knowing it.
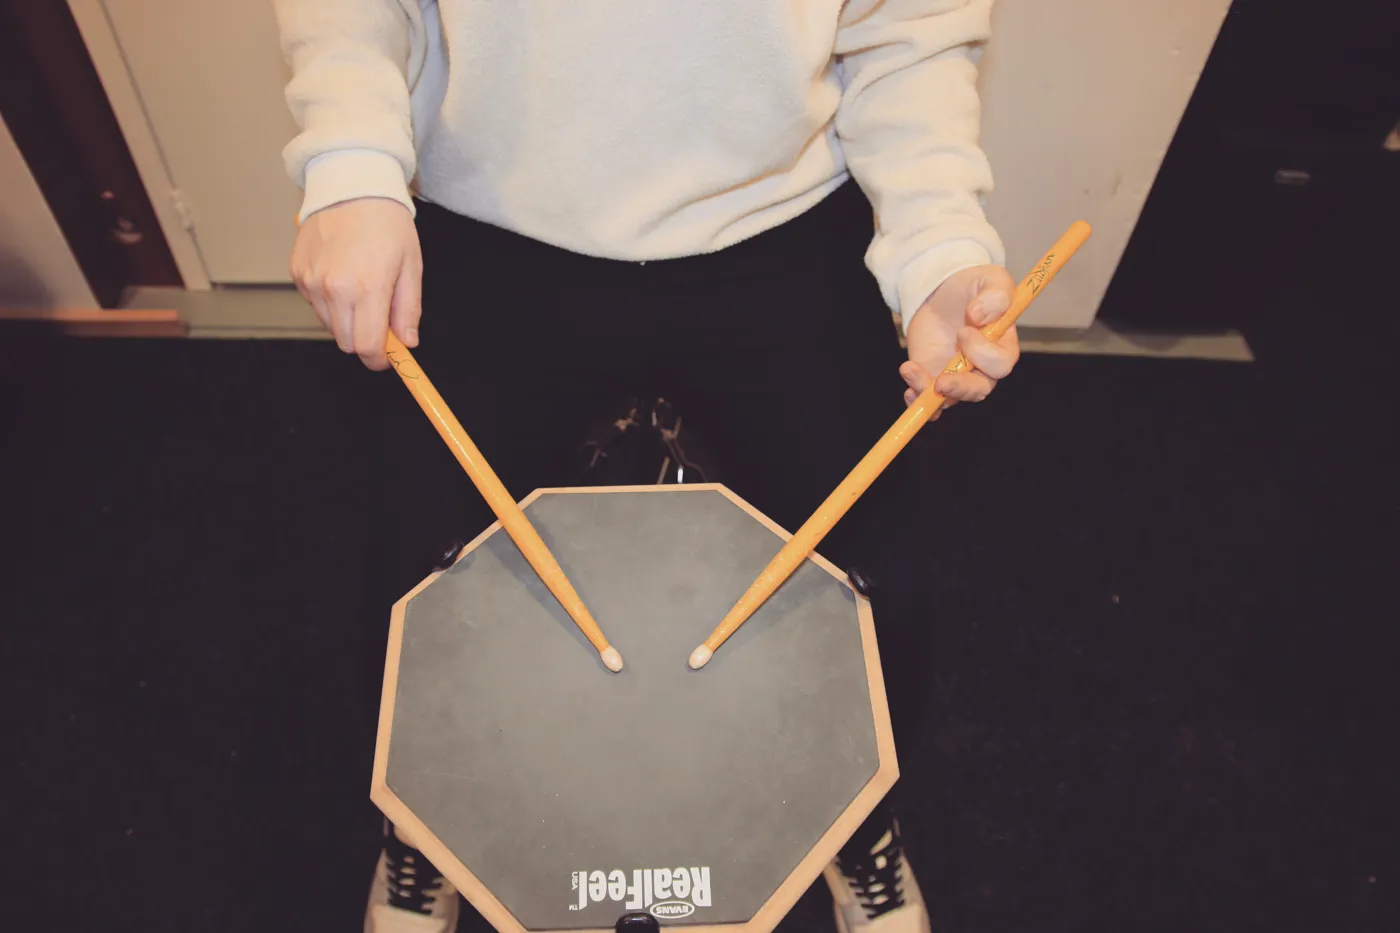
Traditional grip. The difference in this grip is that you hold the left-hand stick differently from the right-hand stick. It's traditionally used a lot in jazz and rudimental drumming.
Stick grips on video
Watch the video for more about the different grips and how to use them. The first 5 minutes are about the grip, and the last few minutes introduce the different grips.
The four basic strokes
The four basic strokes are worth learning soon after you learn the basic grip. Just as rudiments are the foundation for everything we play on the drum kit, the basic strokes are kind of the foundation for rudiments. It's really important to be aware of these and study them right at the start of learning drums.
The four basic strokes are called:
- Full Stroke (Rebound Stroke)
- Down Stroke
- Tap Stroke
- Up Stroke
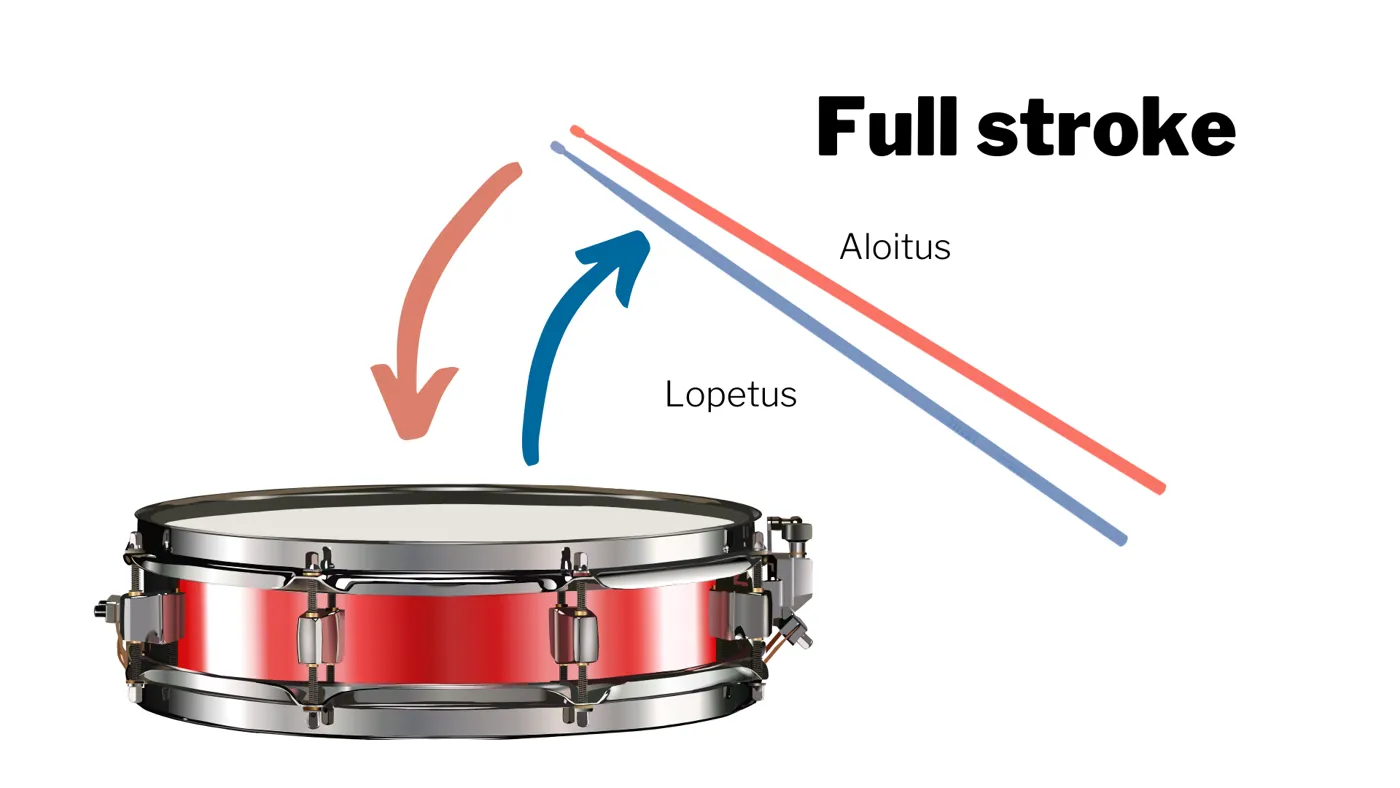
In a Full Stroke the stroke starts high and comes back up.
The goal is to let the stick bounce back off the head loosely and naturally right after the stroke.
That way all the drummer has to do is strike down, like dribbling a basketball.
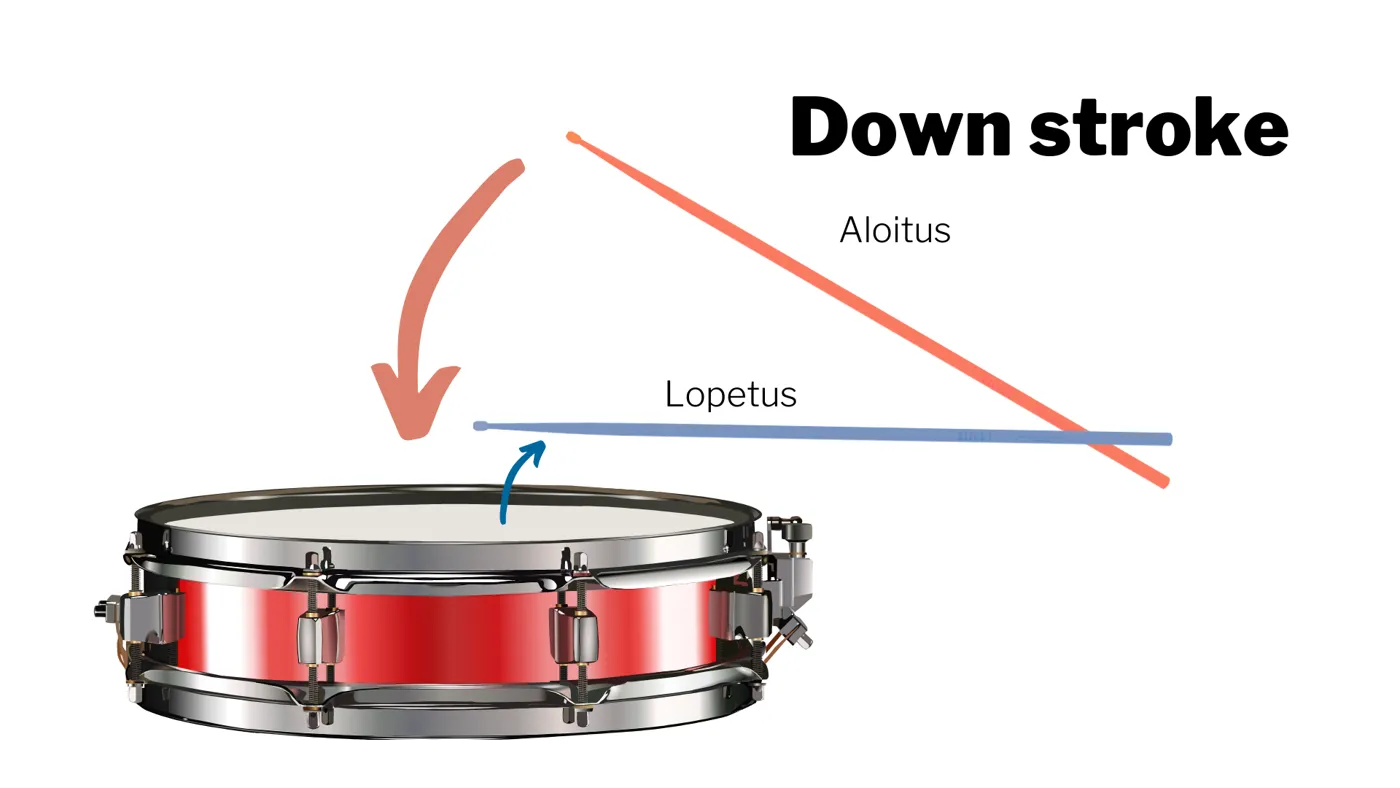
In a Down Stroke the stroke starts high, like before, but you don't let the stick bounce all the way back up after the stroke. Instead you stop it right away, a few centimeters from the head.
This lets you play a soft stroke efficiently right after a loud one.
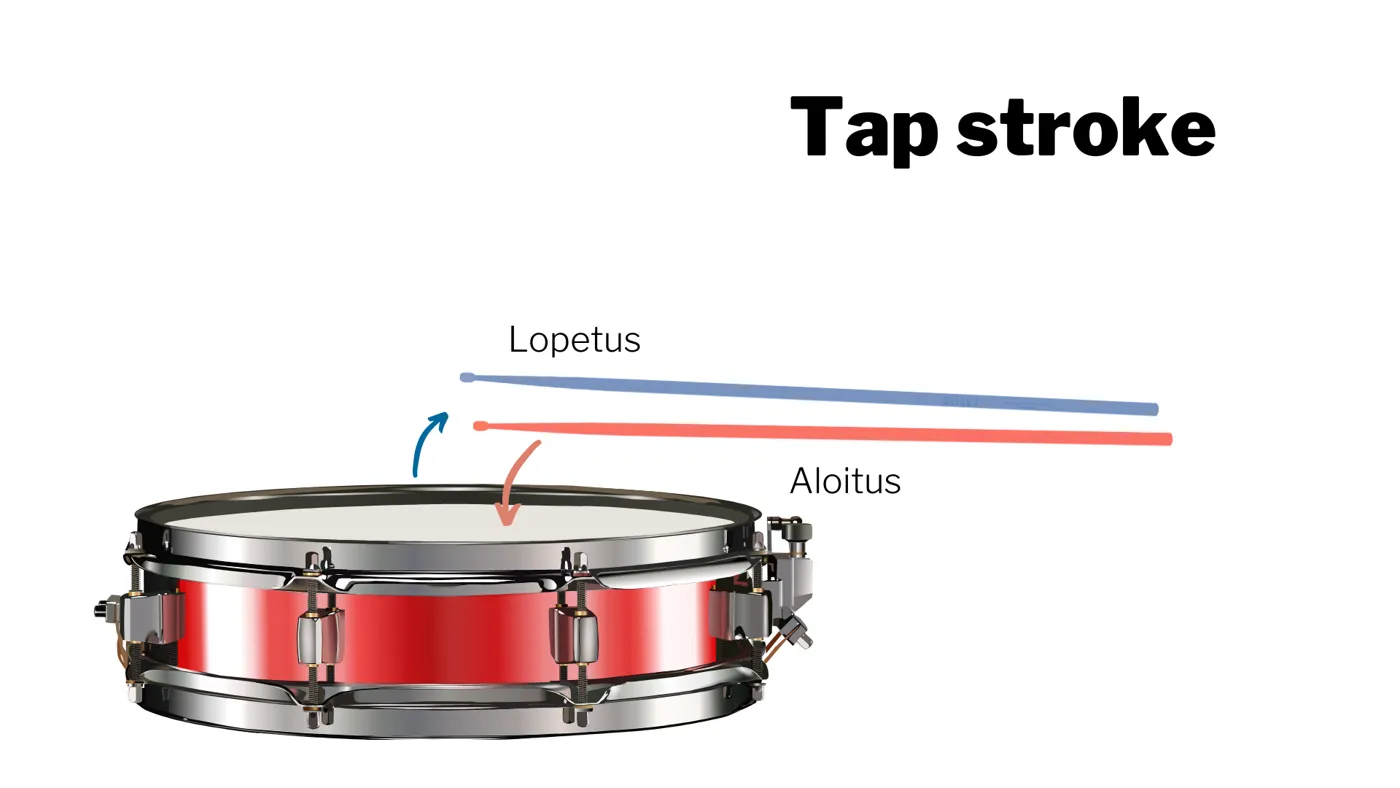
In a Tap Stroke the stick starts low and stays low after the stroke.
This stroke doesn't use the fingers much. The motion comes more from a small movement of the wrist.
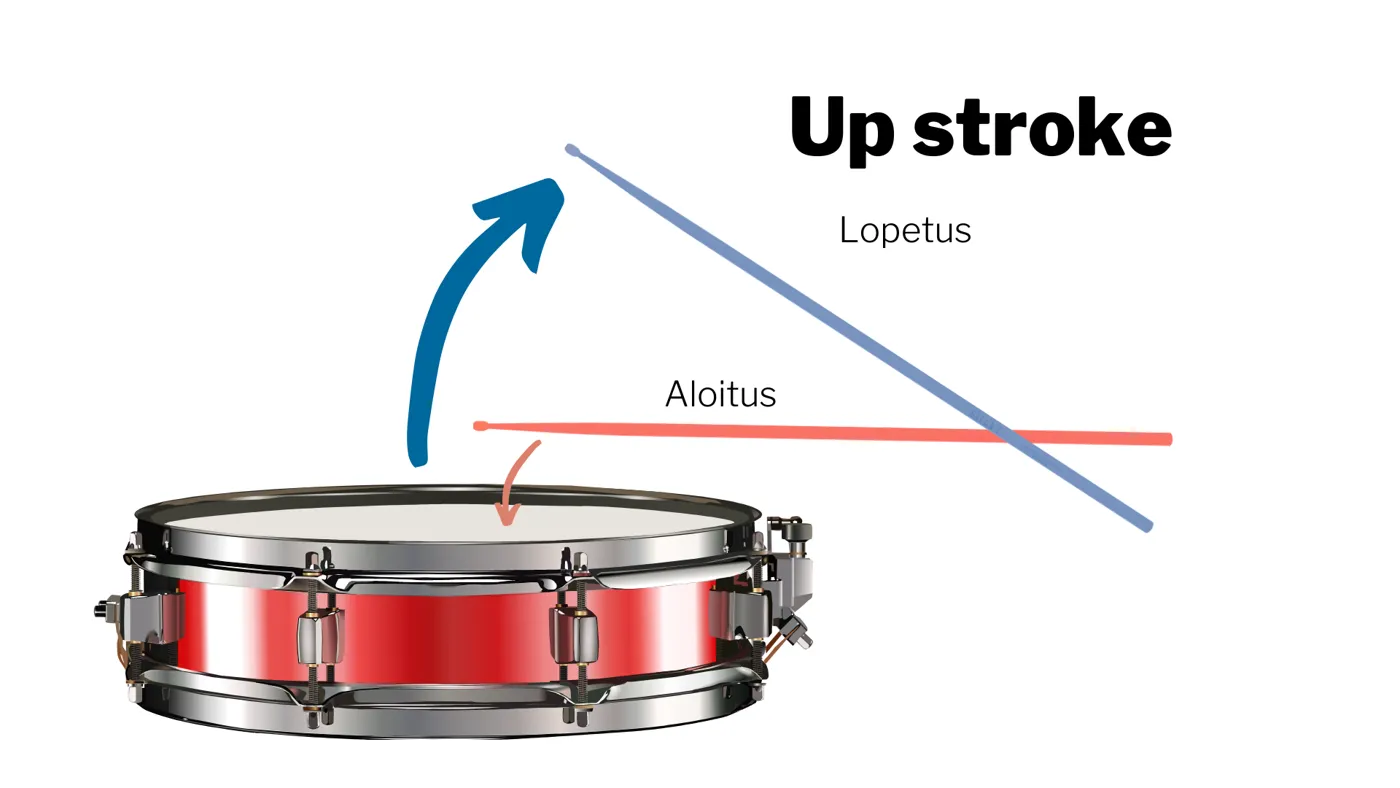
In an Up Stroke the stroke starts low, where the Tap Stroke left off.
After the stroke, the stick is brought back up for the next, louder stroke.
The four basic strokes on video
Watch the four basic strokes in more detail on video, it's only 1:10 long!
Let's practice grips and basic strokes
Exercise 1: Stick grips
Play eighth notes with each grip:
1 bar with the right hand only
1 bar with the left hand only
two bars with alternating hands.
- German
- French
- American
- Traditional (if you want)
Exercise 2: Basic strokes
This time let's play quarter notes, so the tempo is slow enough.
Play 2 bars of each basic stroke with both hands
- 2 bars FULL STROKE - right hand
- 2 bars FULL STROKE - left hand
- 2 bars DOWN STROKE - right hand
- 2 bars DOWN STROKE - left hand
- 2 bars TAP STROKE - right hand
- 2 bars TAP STROKE - left hand
- 2 bars UP STROKE - right hand
- 2 bars UP STROKE - left hand
Start at a slow tempo of 50-70. Raise the tempo calmly, and only once you have the motion down well. Rushing won't get you far.
Those were the basics of stick grips and the basic strokes. Take your time studying these, and practice the strokes on a pad and on the different instruments of the drum kit. Practice different tempos and volumes, and focus on the motion of the stick and the paths your arms move in.